

How to Troubleshoot Foam Formation in ETP Reactors?
Foam formation in ETP reactors can reduce treatment capacity and increase maintenance demands. Netsol Water leads the industry in reactor design and offers clear ways to control foam. We explain how foam forms and how to prevent it. You will learn to spot causes and apply solutions. Each step helps you keep your reactor running at full potential. Smooth operation keeps effluent quality within required limits. Unwanted foam can cause overflow and disrupt downstream steps. You can reduce downtime and protect your staff from foam spills. Netsol Water shares proven measures to manage foam without complex changes.
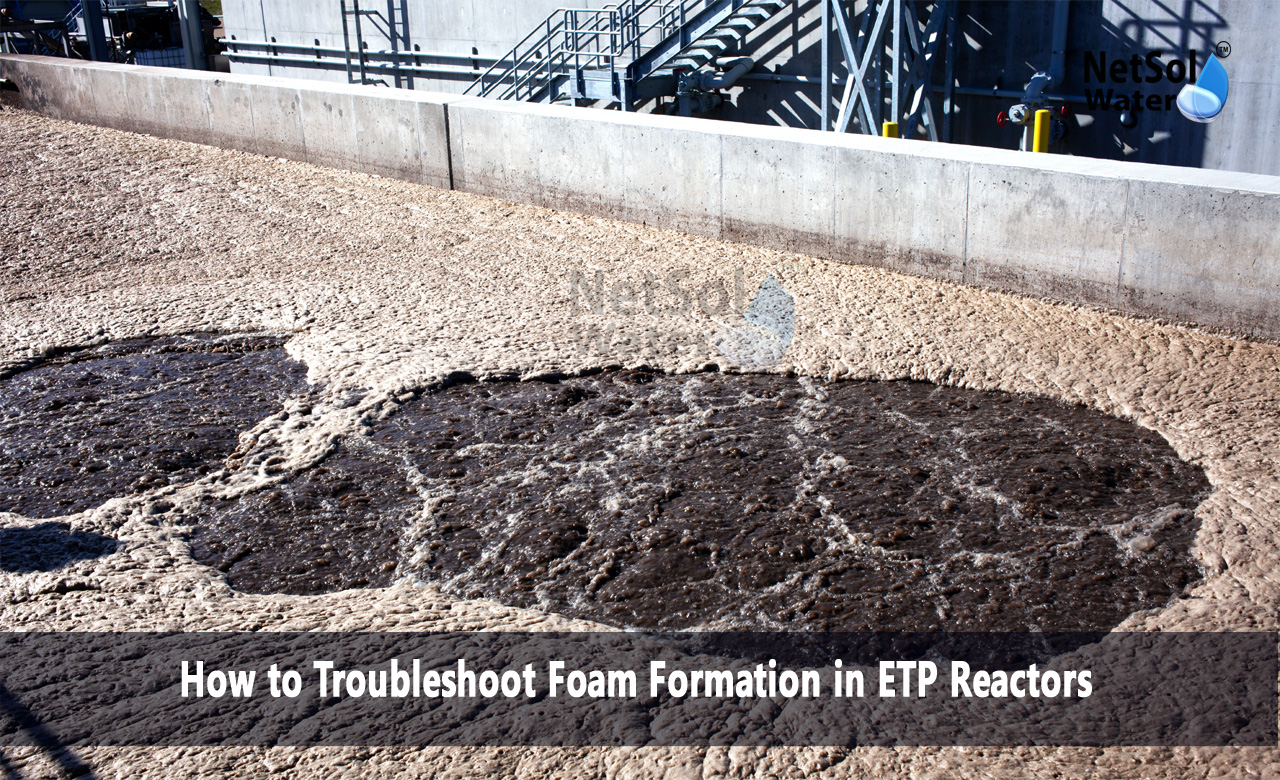
Understanding Foam Formation
Before diving into solutions, we must know why foam appears. Foam arises when air mixes with surfactants or organic matter. This mix creates stable bubbles that rise to the surface. Foam blocks gas exchange and reduces reactor efficiency. We explore key factors that feed foam. Let us have a look at some common triggers and their impact.
Surfactant Residue
Surfactants from detergents coat bubble surfaces and prevent collapse. This leads to persistent foam layers. High surfactant levels enter the reactor from industrial discharge. They travel through pre treatment steps without removal.
Organic Overload
Organic matter fuels microbial growth and bubble stability. Excess organics feed bacteria that produce sticky substances. These substances trap air and create foam. Organic overload results from poor primary settling or sudden load spikes.
Read: Effluent Treatment Plant Manufacturer
Mechanical Aeration
Aeration injects air into the reactor to keep microbes active. Too much air or uneven distribution leads to fine bubbles. These bubbles cling together. They rise slowly and form a thick foam layer.
Identifying Foam Causes
Finding the real cause of foam saves time and cuts costs. You need clear methods to diagnose the problem. Let us have a look at some steps that guide your investigation.
Visual Inspection
Observe the foam closely. Note its colour, texture and persistence. White or off white foam often links to detergents. Dark tan foam may point to organics or grease. Persistent froth signals a surfactant issue.
Sample Analysis
Collect foam samples and test for surfactant content and organic load. A simple lab test reveals the chemical makeup. This helps you target the right remedy. You avoid guesswork and wasted effort.
Process Review
Check recent changes in influent quality and reactor settings. A sudden spike in flow or a new waste source can trigger foam. Compare data logs from before and after the issue began. This reveals patterns you can act on.
Monitoring Foam Levels
Routine checks catch foam before it becomes a problem. You need a simple plan for ongoing monitoring. Let us have a look at some measures you can take.
Level Sensors
Install foam level sensors to track foam height. These devices alert you when foam crosses a threshold. Early warning lets you adjust settings before performance drops.
Manual Checks
Assign team members to record foam depth at set intervals. A short note every two hours keeps you informed. This hands on approach complements sensor data.
Trending Reports
Compile foam data into a daily report. Look for trends in foam volume and duration. Trends show whether actions reduce foam or if you need new tactics.
Adjusting Chemical Dosing
Chemicals help break down foam and control surfactants. You must fine tune dosing to match reactor conditions. Let us have a look at some dosing strategies.
Antifoam Agents
Add antifoam in small doses based on foam tests. Start low and increase until foam falls below the trigger point. Too much antifoam can harm microbes so adjust with care.
Coagulants
Use coagulants to bind organic particles and clear surfactants. This step reduces the feed for foam formation. A balanced coagulant dose cuts foam and improves clarity.
pH Control
Maintain pH within the optimal range for antifoam effectiveness. A neutral pH often works best. Test pH before and after adding chemicals. This ensures the treatment works as intended.
Implementing Mechanical Solutions
Sometimes you need physical changes to curb foam. Simple equipment tweaks can make a big difference. Let us have a look at some mechanical fixes you can apply.
Adjustable Diffusers
Switch to fine bubble diffusers with adjustable flow. This lets you customizeaeration to reduce microbubbles. You still deliver oxygen without creating excess foam.
Foam Breakers
Install foam breaker bars or rotating paddles at the surface. These devices collapse bubbles on contact. They provide a quick cure when foam spikes suddenly.
Surface Skimmers
Use a skimmer to remove floating foam. This tool helps you clear the surface without stopping the reactor. It reduces foam build up between chemical treatments.
Optimizing Operational Parameters
Fine tuning your process cuts foam at its source. You must seek balance in aeration throughput and loading rates. Let us have a look at some key parameters you can adjust.
Aeration Rates
Reduce airflow to the minimum needed for microbial health. Lower air input means fewer bubbles and less foam. Monitor DO levels to ensure microbes thrive.
Hydraulic Retention Time
Adjust the retention time to allow solids to settle before aeration. A longer dwell time reduces organic carryover. This step lowers foam fuel at the start.
Sludge Age
Control sludge age so that microbial types stay balanced. Older sludge may produce sticky byproducts that trap air. A steady sludge age keeps the biomass stable and less prone to foam.
Conclusion
Foam formation in ETP reactors poses a real challenge for plant managers. Netsol Water leads the field in reactor design and support. We guide you from cause analysis to mechanical fixes. We help you optimize every step to curb foam. If you face foam issues reach out to Netsol Water for expert help. Contact us today to request a consultation on foam formation in ETP reactors. We stand ready to provide practical solutions and ongoing support.
Contact Netsol Water at:
Phone: +91-9650608473, Email: enquiry@netsolwater.com